Come check it out, I'm all fancy now!
Wednesday, February 1, 2012


Friday, December 16, 2011
Flower Growth Chart

I know I have been absent a lot this past year and I do apologize. But can you believe my little Zoe turned 1 year old today! This has been one of the best years of my life. And to end it off, I wanted to create a growth chart for my little flower. I have seen cute ones at stores and online, but they are either too expensive or I think "I could do that!" Well, now you can too. :) I made this over a couple of days, but if I had uninterrupted time I could have probably done the entire thing in one afternoon. But other moms out there know that uninterrupted time is not a luxury!

½ yd of green felt by the yard 60”
Fat quarter for center of flower
Scraps of fabric for petals (about 3 fat quarters)
Polyfill Fiberfill
Water Soluble pencil
Sewing Machine
Rotary Cutter and Rulers
Thread
Scissors
** I use an embroidery machine to create the leaves but you would use any type of machine or applique or write the markings by hand.
Creating the stem of the flower:
1. Cut a strip of 6” x 60” of the green felt.
2. Using your water soluble pencil and ruler, draw 1 inch markings along the right side of the vertical length of the stem.
3. Mark every 6” with a pin.’
4. Using a dark green thread, stitch a line at every marking
a. For the inch markings, stitch a 1” inch line
b. For the ½ foot markings, stitch a 1 1/2” inch line
c. For the foot markings, stitch a 3” inch line
Special Note: With the measurements given you should be able to create a growth chart starting at 6” at the base going to just over 6’ tall. I am only 5’4” so I imagine my daughter will be around that height. If you have a taller family, you may want to mark the bottom as 1 foot or even 1 ½ feet tall. You will need at least five inches at the top of the stem to attach and overlap the flower.
5. Mark the 1 foot increments with numbers. You can use your embroidery machine or applique.

Creating the leaves:
1. I created 12 leaves in hope that she will still let me mark her growth at 12 but who knows! I would rather have too many leaves than not enough. I also changed the directions for every other leaf to be on the opposite side of the stem.
Machine Embroidery:
a. Load the vip embroidery file into your embroidery software. Add the years with your text functions. Depending on your hoop size you may be able to create more than one leaf at a time.
b. After stitching out the designs, cut out the leaves.
3. By Hand:
a. Use the attached template to trace the leaves on to your excess felt.
b. After cutting out a bunch of leaves use whichever method you like the write the ages on the leaves

Creating the Flower
1. Create the 12 petals out of scrap fabrics.
2. From your extra felt, cut a 6” circle and a 4” square. This will be the back of the flower and a pocket.
3. Stitch the 4” square on top of the circle.
4. Cut a 5” x 2” strip of fabric. This will be the hanging loop.
5. Fold the strip of fabric in half lengthwise, twice. Stitch along the edge to create the loop.
6. Stitch the loop to the top of the pocket circle.
7. Cut a 12” circle out of your yellow fat quarter. This will be the center of the flower.
8. Stitch a long loose stitch around the edge of the circle.
9. Using the thread, hold one end and gather the circle so the edge folds over itself about 2”.
10. Lay out your 12 petals along the raw edge of the inner circle.
11. Whip stitch the petals to the circle to keep them in tack.
1. Using your sewing machine, use a zig zag stich to secure the petals to the center.2. Place fiberfill in the center of the flower.
3. Cover the hole with the stem and the felt pocket. Hand stitch the three layers together.

You are done! Measure carefully on your wall to hang. Measure your little flower and place the leaves at her mark!
I apologize for the odd spacing of this post. If you would like a pdf version of this tutorial, as well as the VIP embroidery files for the leaves, please email me at 'ellen@3doodle.com'
Monday, April 11, 2011
The Easter Bunny is coming, let's eat candy corn!
 It's almost Easter so we decided to take Zoe to see the Easter Bunny. She will be four months old next week, I can't believe how fast time has gone by! She is our big little girl and is absolutely wonderful. She was so happy with the Easter Bunny, I am so happy with her picture! My maternity leave is over but I had such a wonderful time off with her. Only the past month or so was I able to get any actual sewing done. It took us a while to develop a routine. But I loved every minute of it. I made some soft books for her and joined the Stuffed Team. Below is my contribution to our calendar which will be coming out later this year.
 I am currently in the Stuffed Bunny show in St. Pete at the Eve N Odd gallery. I also have work hanging for the "Hip to Be Square" show at the Bricks in Ybor. Local peeps check it out! During my maternity leave I started experimenting with my 3D modeling, printing on fabric, and quilting. I think it turned out great, we'll see if it sells!
Tuesday, January 11, 2011
Baby Zoe is here!
 (Zoe at birth)
It has been a busy and exhausting few weeks, but I finally had a chance to post. Baby Zoe arrived December 16th, 2010 at 9:34 am. She weighed 7 lbs 8 oz and was 20 3/4" long. She is the most precious perfect princess and we couldn't be happier!
 (2 weeks old)
 Our little Rocker chick.
Friday, October 22, 2010
Quilts, Quilts!
 I completed the "Life is a Stitch" quilt a while ago and sent to my mom for long arm quilting. I love piecing quilt tops, but can't stand the actual quilting together part! The pattern is from Kimberley Enimo's Jelly Roll Quilts and More book. Fun pattern, pretty easy to do. It used Honey Buns to make the quilt. I changed it a little to use up some of my strips and put blocks in the corners instead of solid red. If you look closely the fabric has scissors, little irons, pin cushions, I thought the sign went perfect with it!
 This will be Zoe's wall hanging quilt! It was a lot of fun to make, I really enjoy doing applique. I adapted the pattern Annie's Garden from Material Obsessions. I only did the top half of the quilt pattern and then with help from my mom scaled it down 50%. It being a baby quilt/wall hanging, it didn't need to be huge! I used the dark purple as the trim because the upper wall it will be hanging on is pink! It should look great above her crib. I loved the overall look of the original quilt and thought it would go well with the fairy garden theme we have for her nursery. When I originally bought the book I wasn't pregnant yet. But when I saw the pattern I knew it would be above my daughter's crib one day! In the pattern she uses more flowers and hearts. I took out the hearts and a few flowers from the original pattern to add the fairy and mushroom houses. Even better I have lots of left over fabric to make a plush lady bug, mushroom house, and flowers!
I am 31 weeks and can't wait for December to get here! I'm starting on making Christmas presents this weekend for the homemade touch. That and when the time gets closer I will be so big I don't want to do Christmas mall shopping!

For the locals, I will be selling at this year's Atomic Holiday Bazaar! I went as a shopper last year and couldn't believe the indie talent. This year I am a vendor and will be huge! Come out to it if you're around the area, it's our biggest indie craft show!
Tuesday, September 28, 2010
Six Degrees of Kevin Bacon

This past weekend was the opening of the "Six degrees of Kevin Bacon" show at The Bricks in Ybor. This was another project that took a long time I was keeping secret. I didn't want anyone to know I was making the Great Gonzo! The show contained 18 artists making portraits of famous actors/ characters that can be tracked back to Kevin Bacon. Most actors can be tracked back in three or less moves, but we had to come up with six moves exactly.
If you are interested, The Great Gonzo was in “The Muppet Movie” with Steve Martin who was in “Sgt. Bilko” with Dan Aykroyd who was in “Sneakers” with Robert Redford who was in “The Sting” with Paul Newman who was in “The Color of Money” with Tom Cruise who was in “A Few Good Men” with Kevin Bacon.
While I was making Gonzo, I had a clear picture in my head of what I wanted. I was first going to make him in his caper outfit that he gets shot out of the cannon with. But doing some research and Muppet Show watching I realized he actually didn't do that that often. He was usually wearing a suit. I found a photograph of Gonzo in a maroon suit almost in a 'Kramer' pose. I thought this would be perfect! Jason (my husband) had the brilliant idea to add the chicken feathers around himdue to his love of chickens.
When I finished Gonzo, I was happy with him but not 100%. I was afraid he would look 'crafty' compared to the other fine artists that were accepted into the show. Well apparently I had nothing to worry about! Gonzo sold the day of the show, even before the opening, in the the middle of the afternoon! While at the show I sat in an area where I could watch my piece, partly because I was afraid someone would bump his nose, but kept seeing great reactions to him. People smiled, laughed, and kept saying how much they loved it.
Apparently I am doing something right!
 Gonzo with his magical red "sold" sticker. My husband and I only stayed to 10 pm, and at that point were the only two that sold! Below is his piece which sold while we were there.
Saturday, September 11, 2010
Quilts, Dolls, and Baby!
I have been slowly creating more plush items, but a few other projects took priority. Since the wedding has now occured I can finally show off the wedding quilt I made for my husband's cousin! The pattern is called "Fandango" and in the orange borders and backing are little love birds. It turned out amazing but took way too long! Next I received the wonderful order from the Florida Museum of Women Artists! I was able to make 10 cats very quickly, but the quilted dolls took a bit more time. Here are the finished 8 in their color varieties!
 Since then I have just completed a piece for the "Six Degrees of Kevin Bacon" show at The Bricks in Ybor. The show isn't until September 24th so I'm not revealing it yet! Since I was doin all of these projects I wanted to get back to sewing something for my upcoming little girl. Here is her Christmas bunting, hat, and matching stocking! Let's hope she is here before Christmas! 25 weeks down!
 Next I received the wonderful order from the Florida Museum of Women Artists! I was able to make 10 cats very quickly, but the quilted dolls took a bit more time. Here are the finished 8 in their color varieties!
 Since then I have just completed a piece for the "Six Degrees of Kevin Bacon" show at The Bricks in Ybor. The show isn't until September 24th so I'm not revealing it yet! Since I was doin all of these projects I wanted to get back to sewing something for my upcoming little girl. Here is her Christmas bunting, hat, and matching stocking! Let's hope she is here before Christmas! 25 weeks down!
Sunday, August 22, 2010
Florida Museum for Women Artists
This past week I received an order for 20 dolls from the Florida Museum for Women Artist's gift shop. Check them out, it looks like a wonderful museum I wish I lived closer to go take a peek! Here are the first ten cats!
 They have also asked for ten quilted dolls, which two are completed so far!
 Everything is going great in Babyland! Baby girl is currently 22 weeks 5 days. Energy comes and goes, and have started the wonderful side effects of pregnancy swelling! This picture was taken at 18 weeks. We had out first baby shower last weekend in NY and received tons of goodies! There are just too many cute baby things that come in pink!

 They have also asked for ten quilted dolls, which two are completed so far!
 Everything is going great in Babyland! Baby girl is currently 22 weeks 5 days. Energy comes and goes, and have started the wonderful side effects of pregnancy swelling! This picture was taken at 18 weeks. We had out first baby shower last weekend in NY and received tons of goodies! There are just too many cute baby things that come in pink!
Sunday, August 1, 2010
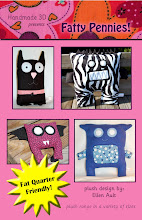
Fatty Pennies!

After a few months of hard work, my first pattern booklet has been released! Please check it out!
Fatty Pennies is for sale at QuiltWoman.com.
Wednesday, July 7, 2010
Nursery Fun!
Ever since I found out I was pregnant at the end of April, my brain has been on everything baby! Well of course, I know. But I will say my plushies took a little back seat for a while but hopefully will start up again this month. I wanted to share some of the items I have made for little Zoe when she makes he appearance this December!
 The first is this giant Z! At our wedding we had giant paper-collage letters at the entrances to the church. An 'E' on my side, 'J' on Jason's side, and an 'A' in the middle. I thought it would be perfect to continue the letters by making one for her nursery.
 Next I was on a bib kick. At this point I hadn't bought anything yet but was itching to make something. I found a real easy bib tutorial online and bought the designs from Urban Threads. I know she won't need these for a real long time, but couldn't resist!
 Making the bibs from scratch took a bit of time. So next I went out and bought a ten pack of terry cloth bibs to embroider on instead. My husband is in gaming so I decided to make one that spoke to him!
Next I have a few onesies to finish and then I really want to work on her baby quilt. Although, I do have a wedding present I need to finish first. Grr, I want to make more baby stuff!
 The first is this giant Z! At our wedding we had giant paper-collage letters at the entrances to the church. An 'E' on my side, 'J' on Jason's side, and an 'A' in the middle. I thought it would be perfect to continue the letters by making one for her nursery.
 Next I was on a bib kick. At this point I hadn't bought anything yet but was itching to make something. I found a real easy bib tutorial online and bought the designs from Urban Threads. I know she won't need these for a real long time, but couldn't resist!
 Making the bibs from scratch took a bit of time. So next I went out and bought a ten pack of terry cloth bibs to embroider on instead. My husband is in gaming so I decided to make one that spoke to him!
Next I have a few onesies to finish and then I really want to work on her baby quilt. Although, I do have a wedding present I need to finish first. Grr, I want to make more baby stuff!
Friday, June 18, 2010
Big News!
So for the past two months I will admit I have done next to nothing on my blog, for my shop, and even very little sewing. And here is why: We found out we were pregnant at the end of April and were beyond thrilled and excited! The past 8 weeks have been a roller coaster of emotions, as I'm sure it will be to come! I have had such little energy that I am sad to say I haven't made a plush since the beginning of April! In April I was tired all the time and had no idea why, until we checked this out!
May led to our first ultra sound where we saw our little blob and found out we were due Dec. 23rd. Because of sweet baby this will be our first Florida Christmas! May was very tiring and exhausting, falling asleep by 9 pm. Hey, I would sleep any chance I got.
June has been great. I am finally getting energy back, and even though I haven't sewn any plush yet I made four embroidered baby bibs, couldn't resist! We also had our second ultra sound last week. It was the NT Scan to check for Down's Syndrome which everything turned out fine. And lucky us had such a clear scan that we found out we are having a Baby Girl! Just what I always wanted, our little dream coming true! She was bopping along in there, waving, and I couldn't feel a thing. Very bizarre. We also got bumped up two days, to Dec. 21st, my husband's birthday. He is thrilled. Today marks Week 13 Day 3. Super-Grandma is coming down tomorrow for a week filled of shopping and sewing, it will be a great start to vacation!
 We found out we were pregnant at the end of April and were beyond thrilled and excited! The past 8 weeks have been a roller coaster of emotions, as I'm sure it will be to come! I have had such little energy that I am sad to say I haven't made a plush since the beginning of April! In April I was tired all the time and had no idea why, until we checked this out!
May led to our first ultra sound where we saw our little blob and found out we were due Dec. 23rd. Because of sweet baby this will be our first Florida Christmas! May was very tiring and exhausting, falling asleep by 9 pm. Hey, I would sleep any chance I got.
June has been great. I am finally getting energy back, and even though I haven't sewn any plush yet I made four embroidered baby bibs, couldn't resist! We also had our second ultra sound last week. It was the NT Scan to check for Down's Syndrome which everything turned out fine. And lucky us had such a clear scan that we found out we are having a Baby Girl! Just what I always wanted, our little dream coming true! She was bopping along in there, waving, and I couldn't feel a thing. Very bizarre. We also got bumped up two days, to Dec. 21st, my husband's birthday. He is thrilled.
 Today marks Week 13 Day 3. Super-Grandma is coming down tomorrow for a week filled of shopping and sewing, it will be a great start to vacation!
Tuesday, April 20, 2010
In the news & Atomic Happenings!

Last Friday's Art After Dark was a great event, and it even got me into the local TBT - Tampa Bay Times! Thanks TBT! I really appreciate you posting my shop link, let's hope it leads to sales!
More good news, I have been accepted to the Atomic Holiday Bazaar in December! It's a long way away, but so far my first scheduled show. So excited! I went last year to shop and saw amazing artists and a huge turnout. I will only be doing a table to help keep cost down so I must concoct more vertical displays. I think I will work on more wall art too, they are so cheery! Check out Atomic's blog for more info!
Sunday, April 18, 2010
Embroidery Pin Holder and Art After Dark
 Today I decided to make myself a little pin holder. I have started accumulating sewing pins for events and memberships I have joined. Instead of leaving them lying around, I created this quick rainy afternoon project to hold them! The doll is from Urban Threads, 20,000 stitch count! She turned out adorable!
I want to thank everyone who came out Friday night for the Art After Dark event at the Tampa Museum of Art. It went great and we had lots of fun! Here are some pictures from the event.


Thursday, April 15, 2010
Wall Art
For the month of April the below two pieces are being shown and are for sale at the Tampa Artist Emporium. I love making plush monsters but had the idea of plush collages of sort. Painting with fabric we could call it. Well, whatever we call it, they turned out fabulous!
 Each piece is 16" x 20" fabric stretched around canvas. My lollipop one was my first doodle and I still love it!
Big, big show this Friday night at the Tampa Museum of Art! Can't wait!

 Each piece is 16" x 20" fabric stretched around canvas. My lollipop one was my first doodle and I still love it!
Big, big show this Friday night at the Tampa Museum of Art! Can't wait!
Friday, March 19, 2010
Heads and Pictures
Hi there! In a few weeks I will be exhibiting at the Tampa Museum of Art, Art After Dark :Cause an Effect show. This is a pillow I made for the event! I will be donating a portion of my proceeds to Making Strides Against Breast Cancer.

I have never made such a large pillow before! It's 26" x 26". The back is a white fleece.
After I brought the pillow back inside I thought my rocking chair looked funny in the backyard so I started having fun taking pictures for a bit. It's spring! the bird are back, the lizards are back, and I even saw the blasted black snake - eek!
This is my favorite corner of the backyard. The fence is falling over, in the summer their are vines all over it, and it has a good view of the neighbor's tree.
Wiley was helping me take pictures as well. He wanted me to see what was on the other side of the fence. I didn't see anything, but two houses over someone does own some loud birds!

I have never made such a large pillow before! It's 26" x 26". The back is a white fleece.
After I brought the pillow back inside I thought my rocking chair looked funny in the backyard so I started having fun taking pictures for a bit. It's spring! the bird are back, the lizards are back, and I even saw the blasted black snake - eek!

This is my favorite corner of the backyard. The fence is falling over, in the summer their are vines all over it, and it has a good view of the neighbor's tree.

Wiley was helping me take pictures as well. He wanted me to see what was on the other side of the fence. I didn't see anything, but two houses over someone does own some loud birds!

Thursday, March 4, 2010
Schmancy Plush You Olympic Challenge!
 I completed my submission for the Plush You Olympic Challenge today! I was assigned the 'Made Up Sport' category and at first was a little nervous about it. But after some brainstorming with my husband about winter sports for Floridians, we created the "Snowbirding Biathlon." Read on for the rules!
Welcome to the Snowbirding Biathlon!
To qualify for the Snowbirding Biathlon the participants must:
1. Reside at least six months of the year in the New England Coastal area.
2. Reside in the winter months in the coastal areas of sunny Florida!
3. Wear a penguin suit.
Snowbirding Biathlon Regulations:
Round 1- Carving on the Water
Participants must complete a round of carving on their surfboards, with at least three turns before hitting the beach. The more turns before reaching the beach will reside in higher points. The participant will be wearing the penguin suit to add difficulty for balance and turns on the board. If the participant falls off their board, they are disqualified for the round!
Round 2 – 50 yd Timed Waddle
Once participants reach the beach, they must sand their boards and race in a 50 yd penguin waddle across the beach. The waddle winner will be competing against the time runs of the other participants. Runners will continue to compete in the penguin suit, adding difficulty to the waddle. Deductions will be made for falling over during the waddle.
The participant with the best score of water carves and run time will be the winner!
Bonus points awarded for the following:
1. Squawking like a penguin during the race.
2. Oldest Snowbirding competitor.
3. Dismounting from the surfboard in a penguin dive.

Subscribe to:
Posts (Atom)